ENGINE UPGRADE
Photos and Text By: Roy R. Sorenson
A few weeks ago a friend asked me to show him how to put working headlights in a model car. I pulled out my box stock, candy red, AMT ’55 Chevy Bel Air Sedan to add the lights. But now that it has the working lights I decided the engine compartment needed an upgrade as well. The motor in the kit is a replica of the 1955 Chevy 265 cu.in. small block Chevy. I probably should have bought a 3D printed engine kit to replace the kits poorly outdated motor, but to save money and time, I decided to just update the motor I had. There’s only two spots on the motor/tranny that glue holds it in place, a quick yang and the motor was out. The radiator support in front of the motor slides into place on these kits, so I never glue them down anyway. I slid it out and sit it aside to update as well. Luckily, the old 12 volt battery on the firewall didn’t have too much glue holding it on. I snapped it off and threw it in spare parts box. The motor needs a few pieces stripped off it; I wedge a hobby knife under the intake manifold and popped it off, then did the same to the timing chain cover and pulleys at the front of the motor. With everything now stripped down, it’s time to start building it back up.
Let’s start at the front of the motor. There are several ways you could replace the kits stock pulleys; use machined aluminum aftermarket pulleys, take them out of a newer kit, or replace them with 3D printed parts. There are several ways to obtain 3D printed parts (if you’re not already printing your own), check the resource list at the end of the article, or start surfing the web. I had a 3D printed pulley set off for a modern Chevy LS motor that featured custom drilled pulleys, alternator, water pump, and power steering pump. A little careful detail painting, and some wiring, and it helped update the motor big time (see photos).
The intake manifold in the kit features manual fuel injection for a race car. Would not be good for the street. I saw a Holley Electronic Fuel Injection (EFI) set up available from Iceman Collections with ribbed air cleaners. I thought this would look good if I painted the air cleaners to match the kits valve covers. The kits molded in distributor cap could be drilled out to accept some small wire, but it’s much easier to use an aftermarket pre-wired distributor. This one comes from Greg’s Scale Model Accessories and even
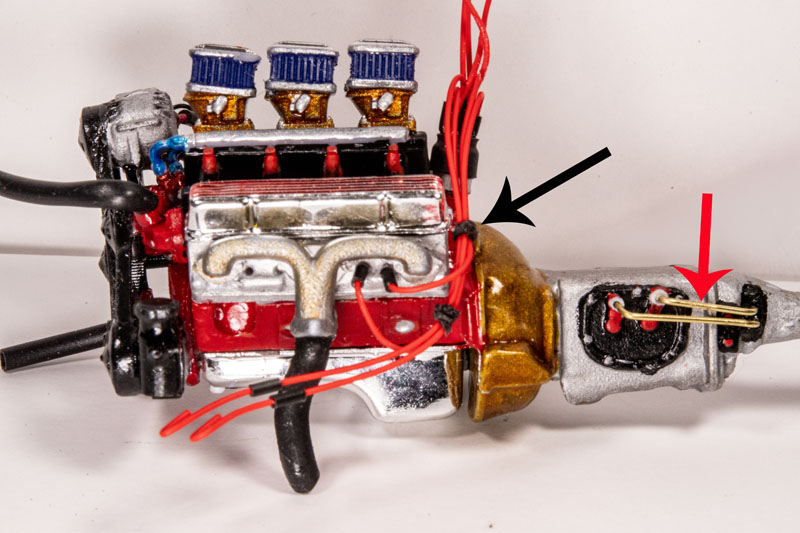
comes with spark plug boots already slipped onto the spark plug wires! I drilled the back of the motor for a hole just big enough to glue the distributor in place. Four holes were drilled in each head where the spark plugs would be on the real motor. Make sure the holes clear the exhaust manifolds. Glue each wire one at a time. Make sure the glue has dried before attaching the next wire. A few words about my cheapie spark plug wire looms. They make photo etch wire looms, and they look great, I just wanted to use a faster/cheaper way of doing it. I like to use black thread. I loop it several times around the wires, making sure on each loop that it’s pulled tight. Then give it a small drop of C/A glue. Once the glue has dried cut off the excess thread. A simple, fast, economic way to keep your spark plug wires neat and tidy!
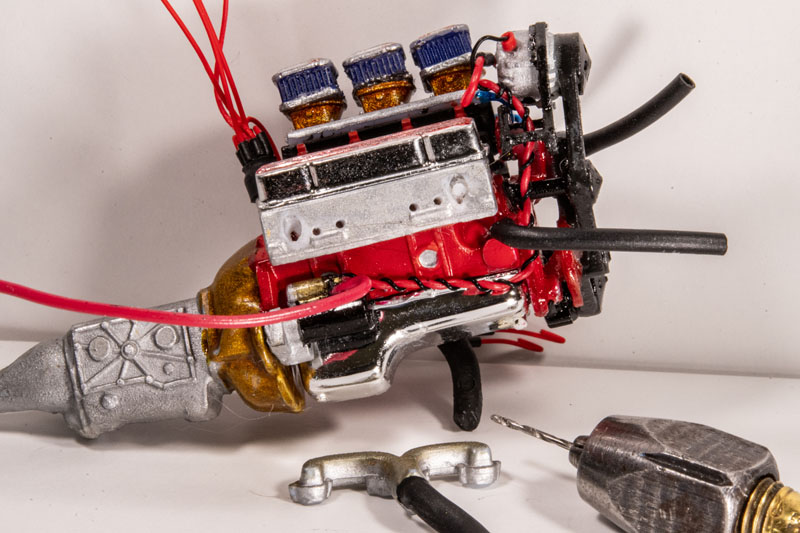
There’s a few more details I wanted to add to the motor. The kits starter motor was pretty much a lump of plastic, so I replaced it with a 3D printed high torque starter. The starter solenoid was drilled for two large red wires (one goes to the battery, one from the alternator), and a small black wire (that comes from the alternator as well). On the other side of the block I wanted to update it by adding a spin on oil filter. The ’55 had a remote filter mounted at the top of the motor with brass lines running to it. I cut a small piece of sheet plastic that a 3D printed oil filter would set on. I painted it to match the motor and glued it to the driver’s side of the block (see photo). Then the oil filter was painted white, given a decal and glued in place. I cheated on the radiator hoses. The LS water pump has the upper hose coming out of the top of the pump, but the old small block has the lower hose coming out of the bottom of the pump. I Drilled a hole at the front of the motor just below the water pump to make a new lower radiator hose. Just for kicks I drilled holes in the tranny linkage to add shifting rods made from brass wire.
With the motor done let’s venture out to detail the engine compartment. The kits radiator will need electric fans.I had a set of 3D printed fans in my parts box that fit the ’55 radiator perfectly. I drilled each motor to accept red wire that will run to the battery on the firewall. A 3D printed overflow tank rides next to the radiator. The battery is a 3D printed piece. I photo reduced the battery stickers for the top and front of the motor. 3D printed battery clamps are drilled to accept the battery cables. Here’s something you might not know; the positive side always has a bigger terminal than the negative side. The battery sits on a battery tray made from scrap sheet plastic. The final upgrade to the engine compartment is a
new power disc brake master cylinder with vacuum power booster. This 3D printed piece features a proportioning valve with molded in brake lines!
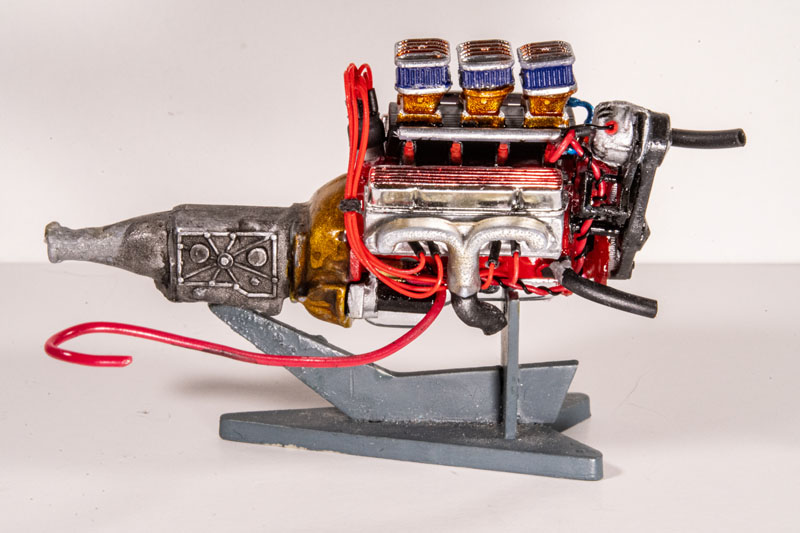
With just a handful of aftermarket and 3D printed parts we’re able to give the motor and engine compartment a whole new updated look. This is one engine upgrade I wouldn’t mind seeing on my real car!
RESOURCES
ICEMAN COLLECTIONS
3D printed engine kits and accessories. https://icemancollections.com/
VCG RESINS BY REESE
3D printed engine parts and accessories. https://www.vcgresins.com/
GREG’S SCALE MODEL ACESSORIES
Pre-wired distributors. https://www.facebook.com/gregsscalemodelcaraccessories
DETAIL MASTER PRECISION MODEL PRODUCTS Photo etch detail parts, wiring, braided line, etc.. https://www.detailmaster.com
CULTS 3D
Resource for STL files to print 3D parts.
|
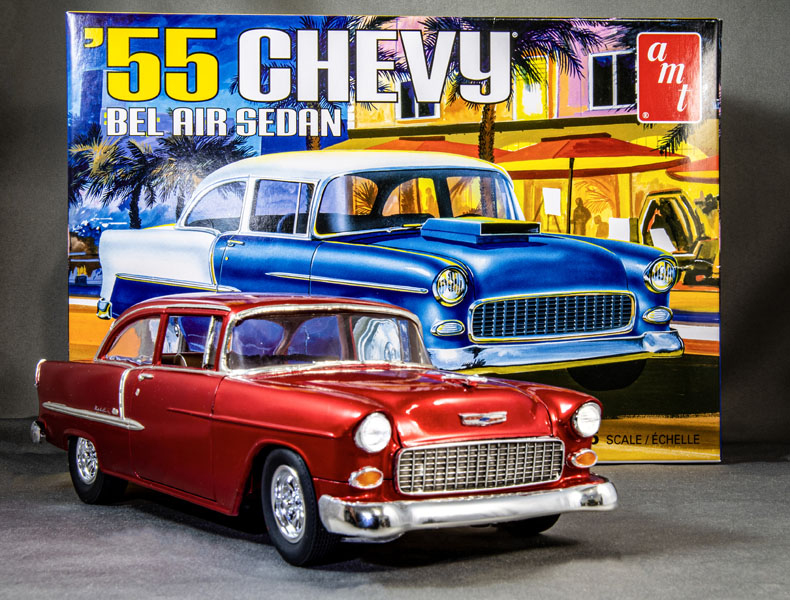
| The AMT ’55 Chevy Bel Air Sedan builds into a beautiful but slightly out dated replica. By adding just a few 3D printed parts and aftermarket detail parts under the hood we can bring the car up=to-date. |

|
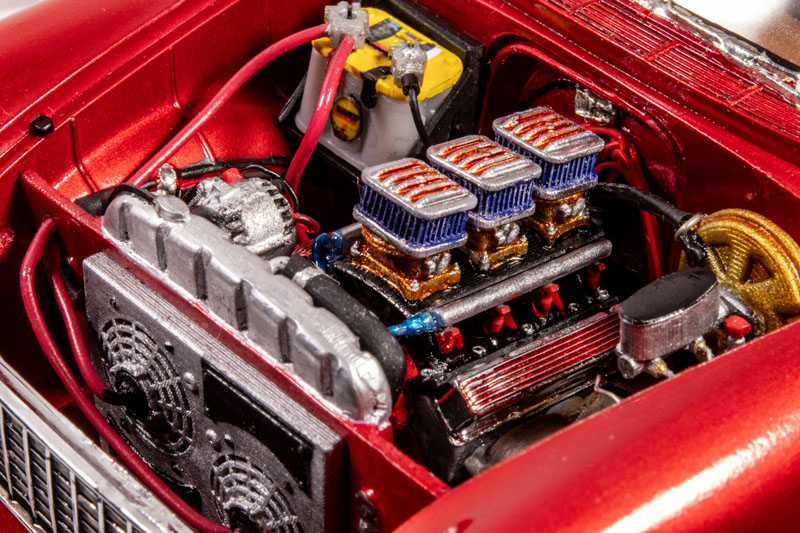
| When I built this model originally, it was all box stock. I did have to cut down the fuel injector stacks so they wouldn’t protrude through the hood. But the injectors, six volt generator, and old style battery badly out date the car. |
 |
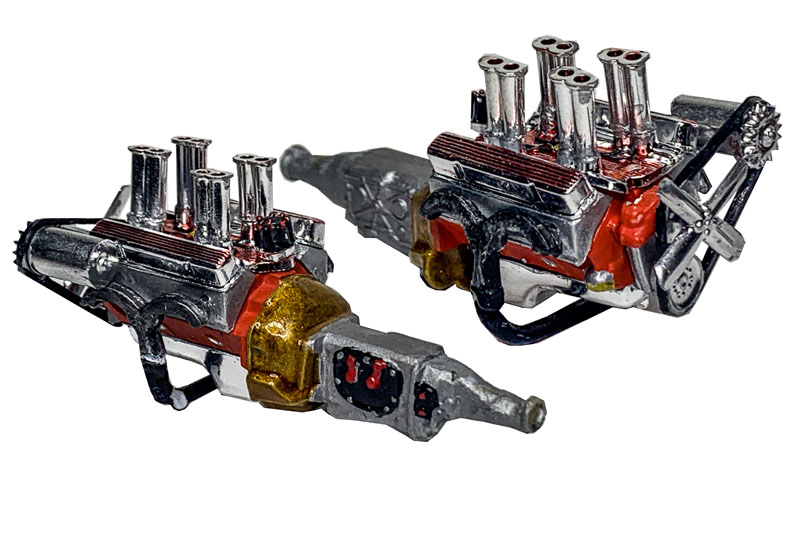
| With just a handful of aftermarket and 3D printed parts we’re able to give the motor a whole new updated look. |
|
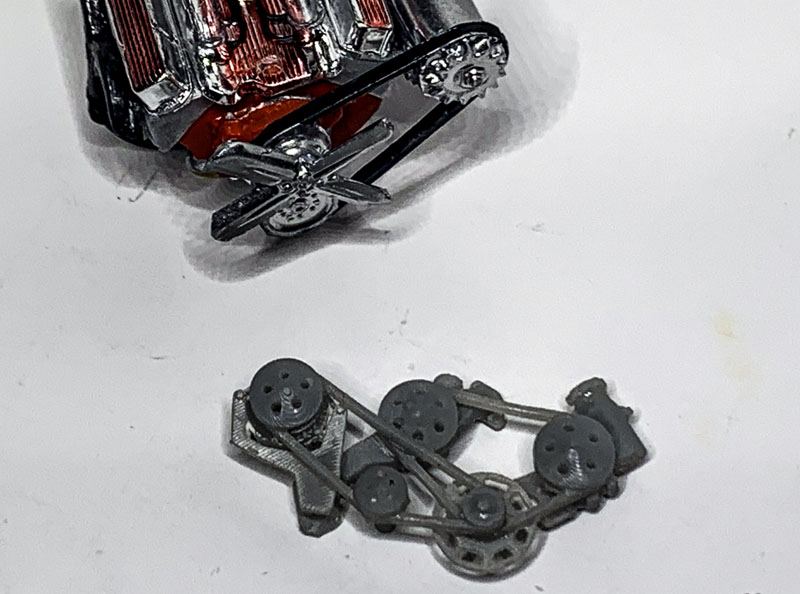
| To make the transformation easier, we’ll keep the kits basic motor and transmission, and just replace a few parts. |
 |
| The 3D printed pulley set is for a modern Chevy LS motor, but we’ll cheat and use it on our small block Chevy. |
 |
| |
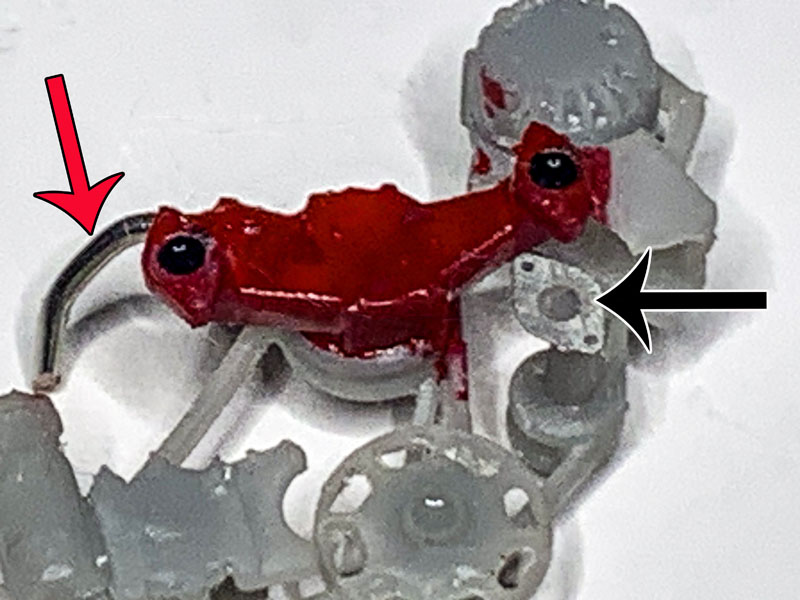 |
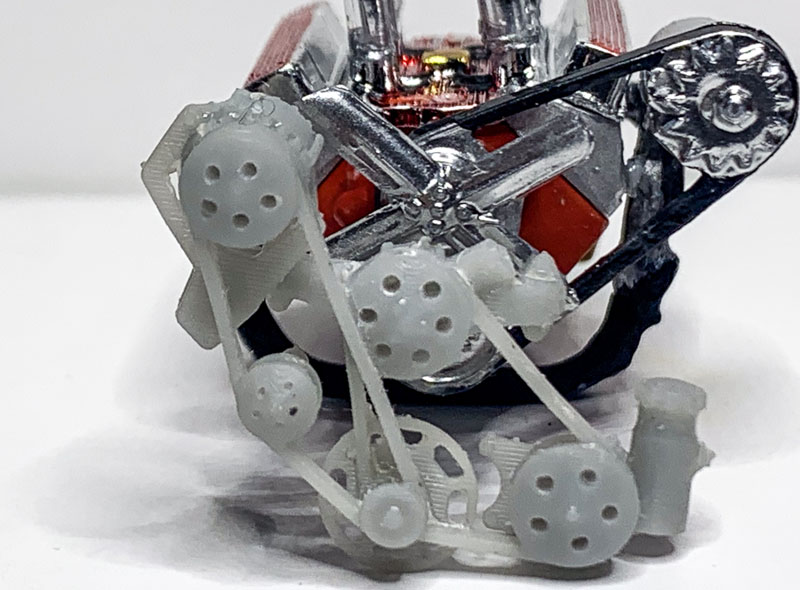
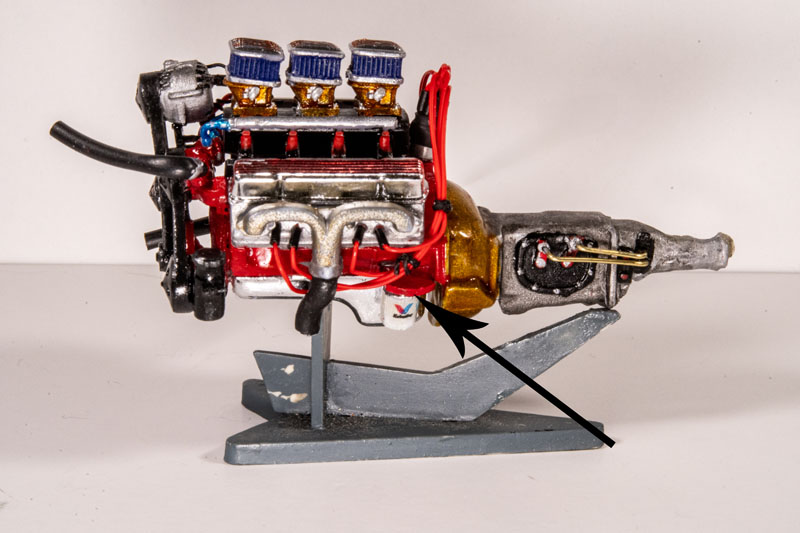
| Start by painting the water pump the same color of the motor (Tamiya Red). I drilled out the top of the water pump and glued in a piece of aluminum wire (red arrow). The idler pulley only had a stud to glue to the motor. I glued a photo etch header flange to it to give it a little more detail. |
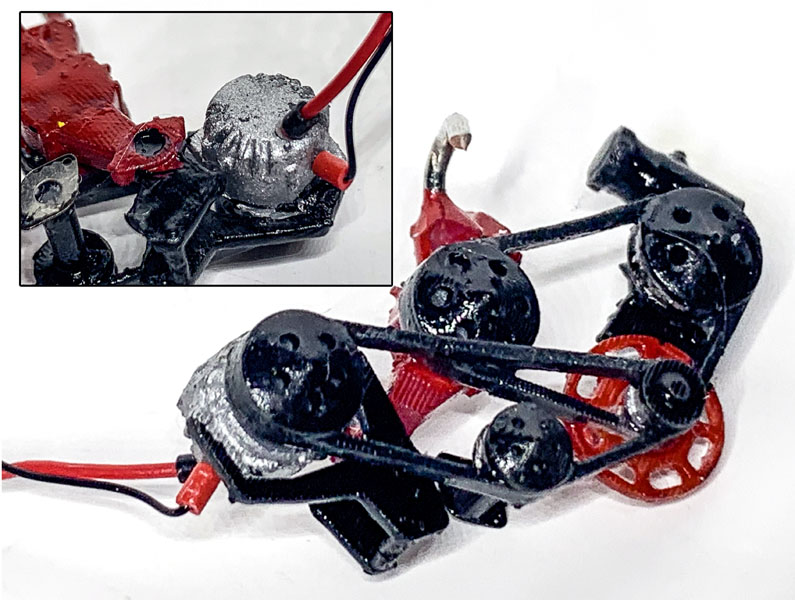 |
| After painting the pulleys semi-gloss black, and the belts rubber black, we painted the alternator flat aluminum. Drill the back of the alternator for a large red wire, and the side of the alternator for a smaller black wire. The crank trigger (the think that looks like a wagon wheel) was painted red. |
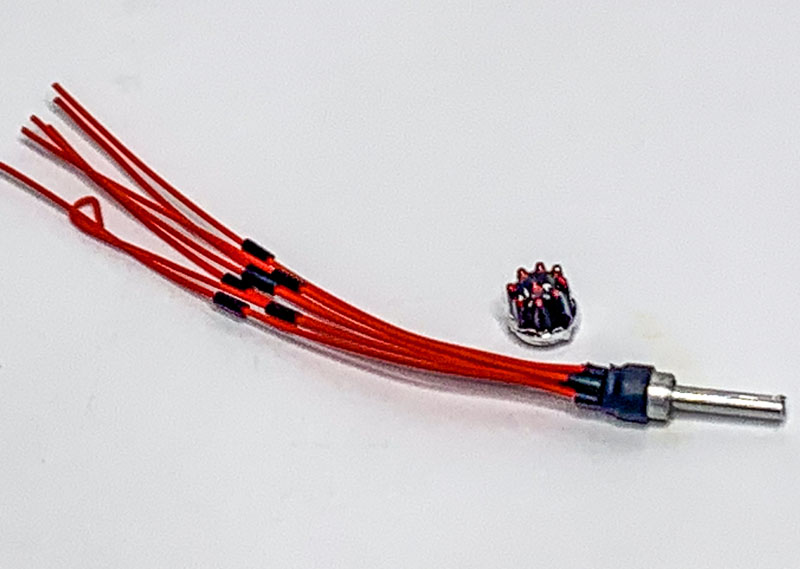 |
| he kits molded in distributor cap could be drilled out to accept some small wire, but it’s much easier to use an aftermarket pre-wired distributor. This one comes from Greg’s Scale Model Accessories and even comes with spark plug boots already slipped onto the spark plug wires! |
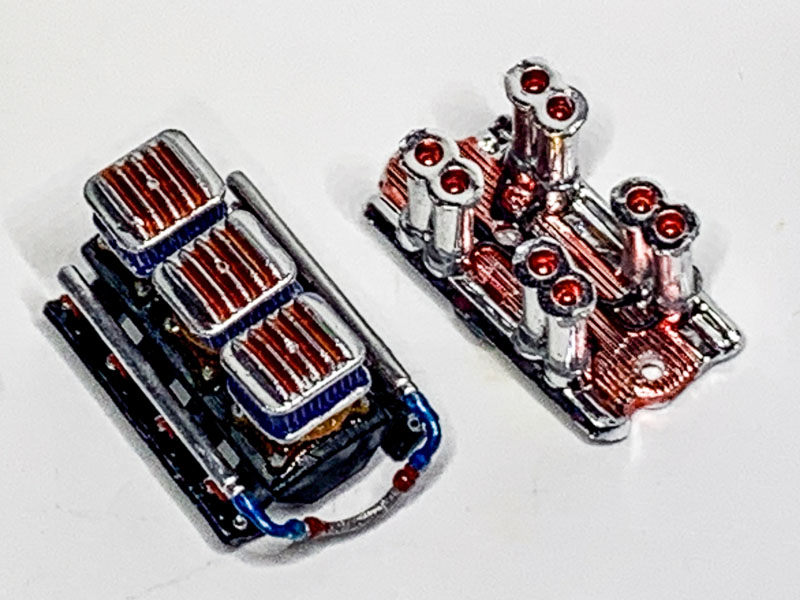
Iceman Collections sells a ton of 3D printed parts. This is their Tri-Power Holley EFI (Electronic Fuel Injection) intake. Check out the great detail on the fuel line and fittings. |
 |
| |
 |
| Here you can see the wires that run from the alternator (green arrow) down to the starter (blue arrow). The third wire on the starter is the battery cable. |
 |
| .We’re going to run four of the spark plug wires to each side of the head. Drill the holes low on the head, and make sure the exhaust manifold doesn’t cover them up. BELOW: The spark plug wires are held tightly together by tying them with simple black thread (black arrow) and given a drop of C/A glue. Glue in one wire at a time, let the glue dry completely before doing the next one. A couple small strips of brass wire were used to simulate shift rods on the four speed transmission (red arrow). |
 |
 |
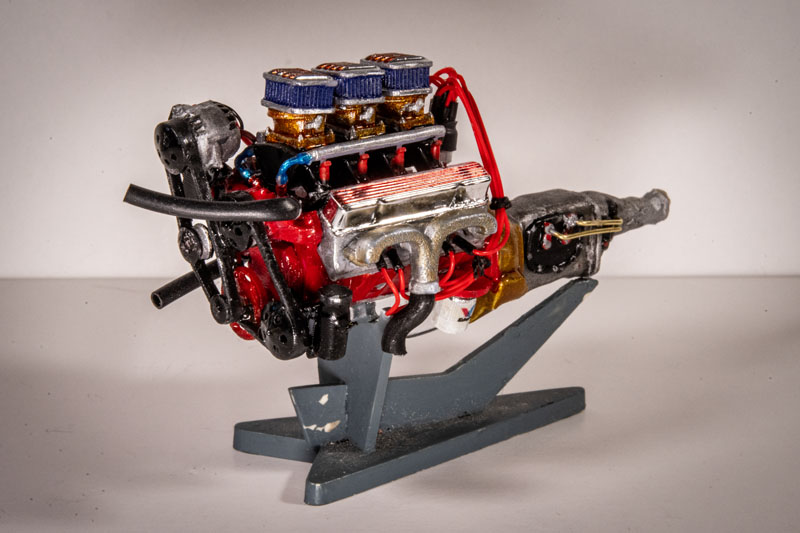
| A 1955 Chevy V8 didn’t have spin on oil filters yet. We made a small mount from scrap sheet plastic, and added a 3D printed oil filter (black arrow). A decal was added to the painted white oil filter to add detail. |
 |
 |
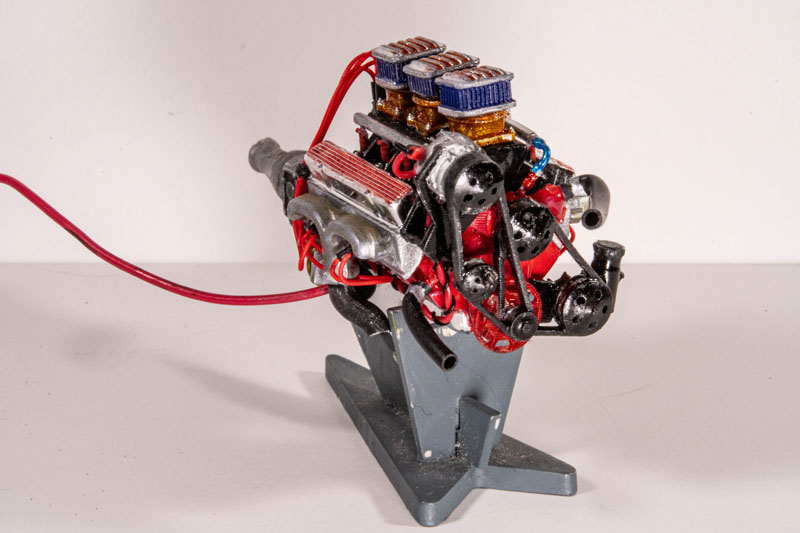
| The completed motor looks great, and is ready to drop back into our ’55 Chevy engine compartment. |
| CLICK HERE FOR PAGE TWO |